Showing posts with label zpacks. Show all posts

XSL 2015 ~ Cross Country SEKI Loop ~ Day 7


Cyrstal clear water in Kaweah Basin

~ Day 7: Pyra Queen Col  ~


Lisa, Michael and I got an early start and headed to Pyra Queen Col, one of the few passes that provide access into or out of Kaweah Basin. Pyra Queen Col is a Class II cross country pass and involves steep and loose boulder and scree fields which make for slow going at times. . . but the views are worth the effort.

Michael, Andy & Lisa


Andy & Lisa in Kaweah Basin


Starting the climb to Pyra Queen Col


Winter Sierra Gear List ~ 2016

In a recent post on Backpackinglight someone asked if it was possible to stay safe, warm, dry and well fed in the winter while keeping an Ultralight base weight (10 lbs or less). 

Fortunately the answer is yes! 

Check out my latest gear list from a recent 4 day snowshoeing trip. I stayed warm and even over-slept down to 10 F using the gear below. 

Let the gram gods rejoice.


Summer Sierra Gear List 2014

For this years summer gear in the Sierra I used the lightest and most functional options, except for my sleeping pad. After being uncomfortable using the Therm-a-rest ProLite and other thin inflatable pads I finally decided to use an extra large Therm-a-rest Xlite. It is 2.5 inches thick which provides plenty of padding on hard granite surfaces and the 25 inch width leaves room for my shoulders and elbows. Plus, by only partially inflating it the pad follows the contours of my shoulders and hips which means a seriously luxurious sleep every night!! It weighs about a pound but the extra weight is well worth a good nights sleep. 

Even with the addition of the heavy sleeping pad my base weight was only 7 pounds. Since it would not be possible to resupply in the remote areas I would be exploring this summer, I had to carry everything I would need for the whole trip. With food for 10 days and 1 liter average water carried my pack weighed in at 23 pounds on day one. See below for details:

Winter Quilt with a Custom Trapezoidal Baffled Footbox.

Winter Quilt with a Custom Trapezoidal Baffled Footbox.


Last year I got tired of sitting out the entire winter then having to struggle to get my 'trail legs' the next summer. I decided to get out and enjoy the backcountry in the winter. . . but the last time I camped in the snow I was a Boyscout and my memories include freezing all night in a canvas A-frame tent.
After hearing about the easy way to the snow via the tram to Mt. San Jacinto I was determined to get out in the winter. I figured that if I could do a few nights in the local mountains I would be ready for a real snowshoe trip in the High Sierra. I would need a much warmer quilt if I wanted to actually stay warm and enjoy the cold winter temperatures.


It was time to make a Winter Quilt with a Custom Trapezoidal Baffled Footbox. 

Heavyweight Ultralight Backpack

After completing the first section of the Sierra High Route last summer I realized it was time to build a much more burly backpack. Since there was nowhere to resupply on these remote trips I needed something that would comfortably hold ten days of food and a bear canister. I also needed a pack that could withstand the beating that comes with scrambling through cross country terrain in the High Sierra. I decided it was time to make my first Heavyweight Ultralight Backpack!

The Heavyweight Ultralight Backpack.

Sierra High Route & Mono Divide: 06/26 - 07/02/2013


Pinecreek Trailhead.

This trip was originally planned to be an 11 day SHR section hike from Merriam Lake to the Silver Divide and back via the PCT. I had planned a few layover days to enjoy Lower Mills Creek Lake and Bear Lakes Basin. . . but by the time I finished a few last minute gear projects (a new backpack, sleeping quilt and stove) the plan was compressed into an 8 day loop with no 'zero' days. 

So with a new more comfortable internal frame backpack and 8 days of food I headed up the switchbacks from the Pine Creek trailhead. The first 2,000 feet to Lower Pine Lake made for a steady but reasonable climb. I enjoyed a nice breeze and long lunch break along the outlet creek. 

For the rest of the day the bugs chased me through Granite Park. 

Cuben Fiber Hybrid Backpack with Removable Internal Frame

After seeing some of the cuben hybrid material used on the Zpacks Exo backpacks, I decided to try some on my own version of a cuben pack. 

The idea with this pack is to make something big enough to hold a Bearikade Weekender or Expedition bear canister plus some winter gear, but still keep it around 8 ozs. I made one out of just cuben and used it on the JMT last summer, but calling it a 'prototype' would be pushing it. People usually passed me and said, "hey, homemade pack heh?". To make things worse it was made out of some bright blue cuben I got on sale on gearswap. 

I also wanted something that would hold up to 35 - 40 lbs if I needed to carry extra stuff for a few miles to our favorite Sierra waterslides this summer. I added channels for a removeable internal frame (taken from a GG Gorilla) to handle heavier loads. 

Plus, I wanted something that could take some serious abuse on the Sierra High Route this summer. 

The material is all available at Zpacks.com. The cuben hybrid is made from 1.43 oz black cuben on the inside and 50 denier polyester on the outside. It feels strong and tear resistent. 

For the pack design I borrowed generously from the Blast and Gorilla packs. For the shape of the shoulder straps I traced a North Face daypack. Some of the more original things added are adjustable elastic cords at the top of all the exterior pockets and adjustable pad straps. I like having two medium sized rear pockets instead of one large pocket. It makes it easier to find stuff after a long day.

The cuben hybrid material is attached to the bottom 3" of the pack and side pockets using a triple stitched flat felled seam. All of the attachment places are reinforced with cuben bonded to the main material at a 45 degree angle. The area where the shoulder straps attach to the main pack is triple reinforced. The internal channel for the removeable frame is made from the heavier cuben hybrid material. I noticed that the ends of the frame cut through the channel made from 1.43 oz cuben in the earlier prototype, but the hybrid doesn't rip. 

The total pack size is about 3,250 c/i. The main pack bag is 2,500 c/i, side pockets 300 c/i, rear pockets 450 c/i. The main pack is 6" deep, 12" wide and about 34" tall.

The total weight is 9 ozs (without the internal frame). The heavier cuben hyrid material added about 2.5 ozs compared to a similar pack I made with just cuben. The removeable internal frame adds 3 ozs. 


Side view (with internal frame and Gossamer Gear sitpad for back padding). 


The bottom 3" are made with the more durable cuben/nylon hybrid from Zpacks.com. 

Interior detail of the internal frame channels (without the frame)

Interior detail of the frame channels (with the frame)

Adjustable front pocket (open)

Adjustable front pocket (closed)

Adjustable side pocket (open)

Adjustable side pocket (closed)


Shoulder strap attachment detail. There is a third layer bonded at a 45 degree angle inside the pack. 

Ultralight Backpacking Essentials


Some of my backpacking buddies have been asking about a list of UL gear as a place to start lightening their pack weight. This is a brief list of some Ultralight Backpacking Essentials that have worked for me . . ,

What is Ultralight?

Ultralight simply means having a base weight under 10 lbs. Base weight is the weight of all your gear not counting consumables (food, water and fuel). 

Ultralight Backpacking Essentials:

A good place to save weight is with “The Big Three”: Your Pack, Shelter and Sleeping gear.
Using the lightest items below it is possible to stay around 3 - 4 lbs for “The Big Three”. . .
I am simply a humble amateur and although there are some experts I am not one of them. That being said here are some ultralight essentials that have worked for me:


Pack:


I have one of these (but with a detachable hipbelt) and it’s great. This pack weighs 7.4 oz for 2,600 c/i’s, which is plenty of room for whatever kind of trip you want. Joe Valesko makes these by hand and did his 2,600+ mile thru hikes using this pack. It is made from super strong cuben fiber, it has a built-in padded hipbelt and carries 20lbs just fine. It looks a little strange, cut it’s cutting edge. The material is very strong for the weight. Frameless, so you just use your sleeping pad inside the pack to create structure. There are lots of options to customize as you wish. Current wait is about 4 weeks.

OR

Zpacks Arc Blast: http://zpacks.com/backpacks/arc_blast.shtml

Comfortable for up to 20 lbs and the new carbon fiber external frame means a more comfortable fit and no sweaty back.

OR


I have one of these. It weighs 24 ozs. It’s great if you want to carry a little more gear and weight. I used this one at Dinkey Dome when carrying gear for both Candy and I. It has an internal frame and it’s a good way to ease into the ultralight deal. Carries up to 35 lbs comfortably. Ready immediately.
.
OR


I have one of these and it is Candy’s main pack. It weighs 8.1 ozs!. Great for loads up to 12 lbs total. It is delicate but extremely light.

OR

Zpacks Arc Haul: http://zpacks.com/backpacks/arc_haul.shtml

Good for loads over 30 lbs. I just ordered one of these (as of 05/05/2015) and although there is a six week waiting list I was able to order it with several custom options. Sometimes on trips over 8 days I need a heavier pack to carry extra food or heavier winter gear. Review to follow!


Shelter:

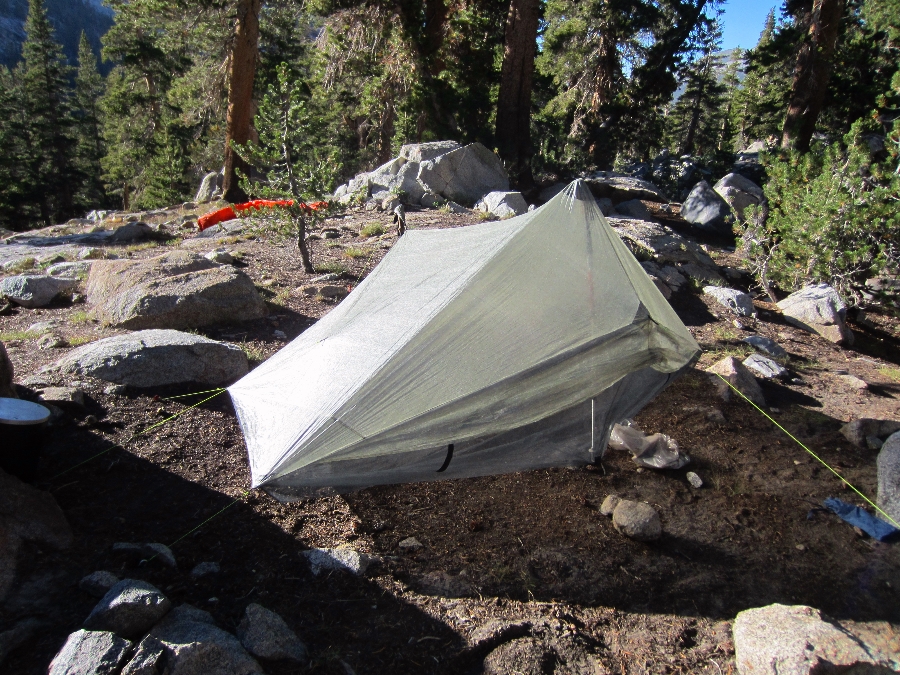
Zpacks Hexamid Solo Tenthttp://zpacks.com/shelter/hexamid.shtml


I have one of the solo tents, it’s amazing. At 8 oz it’s the lightest fully enclosed tent available (10 oz for the twin). It uses a somewhat strange technique of putting your ground sheet on top of the netting. He also used this for his 2,600+ mile thru hikes. I got it without the optional “beak”.

Six Moon Designs Haven Tarp and Inner Net Tent: http://sixmoondesigns.com/tarps/69-haven-tarp-cuben.html

I use this modular setup when camping with my wife Candy. At 26 ozs it is the lightest two person/two door/two vestibule fully enclosed double wall tent available. It uses two trekking poles to setup. It's possible to use just the net tent on warm nights, just the tarp for 360 degree rain protection or both at the same time for a full double wall shelter. The tarp only weighs 10 ozs which is less than most one person shaped tarps with 360 degree protection (like the MLD solomid).

Six Moon Designs Skyscape Xhttp://sixmoondesigns.com/tents/ssX.html

This is a hybrid double wall shelter for one person. It is 80% double wall with only a small area that is single wall. There is an attached inner net, a bathtub floor, two vestibules and 360 degree protection. This is a very stable shelter as it uses two trekking poles in a V shape inside. The one I received weighs 14.5 ozs. I have used this in the High Sierras during all night storms for several nights in a row at 11,000 feet with no problems. Slept like a baby.

Mountain Laurel Designs Solomidhttp://www.mountainlaureldesigns.com/shop/product_info.php?cPath=47&products_id=137

This is the shelter that professional adventurer Andrew Skurka (see http://andrewskurka.com/ ) used on his 4,800 mile Alaska trip. Although it is advertised as weighing 11 ozs for the cuben version I custom ordered one with the lighter cuben fiber (0.51 oz/sqyd) and it only weighs 8.6 ozs. This is an amazing shelter. I used it during a five day snowshoeing trip last winter in the High Sierra and slept like a baby. It is a floorless shelter that provides 360 degree protection from wind, snow, rain etc. It does not provide bug protection and it does not have a floor so it is not appropriate for the early season when bugs are a problem. I use a poncho/ground sheet for the floor. If you are interested in photos of this shelter check out my trip report: Glacier Divide Winter 2013

Six Moon Designs Gatewood Cape:   http://sixmoondesigns.com/tarps/GatewoodCape.html

11 oz solo tarp tent and rain gear and backpack rain cover. This thing provides full 360 degree coverage as a shelter AND it’s a poncho for full coverage rain gear AND it’s a pack cover in case of rain AND it can be used as a bivy/sleeping bag cover. This is a great multi-use item. I have one of these, and they are currently available. You can also get the Serenity Net Tent, an inner net tent to protect from bugs, or also to use alone to sleep under the stars. The inner net tent is about 8 ozs.

OR

Another option is to use a tarp and a bivy. As a modular setup the good thing with this setup is that you can sleep under the stars but still protected from bugs etc by just using the bivy. . . or just the tarp for basic weather protection. . . or both for full protection. While on a JMT thru hike in 2010 I used a tarp and bivy setup that only weighed 7.1 ozs for both!

Here are links for the lightest tarp and bivy:

Cuben Fiber Tarps:

http://zpacks.com/shelter/tarps.shtml.

I used one of his 5.5’ x 8.5' cuben tarps on the JMT in 2010, it’s 3.2 ozs and very good quality).

Mountain Laurel Designs Superlight Bivy:

http://www.mountainlaureldesigns.com/shop/product_info.php?cPath=22&products_id=30.

At 5.5 ozs this is the lightest commercially available fully functional bivy I have found. I made my own bivy and used it on the JMT in 2010. It weighs only 3.9 ozs. For details check out my: Ultralight Bivy.


Sleeping:

Think ‘Sleeping System’ and you can use a much lighter sleeping bag along with silk long johns to extend the warmth range by another 10 degrees without adding any weight (I bring silk long johns anyway). May PCT thru hikers use these 40 degree bags. So even with this ultralight 40 degree bag, it’s possible to stay warm at below freezing temps. Nice.

Sleeping quilt:

Basically a sleeping bag without a bottom, quilts are really popular with ultralighters. The benefit is that you don’t waste down on the bottom where it will just be compressed and not useful. Also, you can totally spread out without the claustrophobic feeling of a bag. All of the down is on the top and sides. My next project is to make one myself using the Thru-hiker pattern. Quilts typically weigh about 16-18 ozs for a 30 degree temp rating. I’m not sure this is something you’re interested in, but here’s a few links:

Katabatic quiltshttp://katabaticgear.com/shop/category/sleeping-bags/ . I like these best and they consistently receive the highest ratings. 

Nunatak quiltshttp://www.nunatakusa.com/site07/arc_products/arc_specialist.htm . High quality, expensive.

Jacks-R-Better wearable quiltshttp://www.jacksrbetter.com/Wearable%20Quilts.htm . No need to bring a jacket.

My own custom made 12.5 oz summer quilt:

http://seatosummitultralight.blogspot.com/2012/04/lightweight-summer-quilt.html

My own custom made 17 oz wearable three season quilt: 

http://seatosummitultralight.blogspot.com/2012/04/wearable-quilt.html

My own custom made 23 ozs winter quilt: 

http://seatosummitultralight.blogspot.com/2013/11/winter-quilt-with-custom-trapezoidal.html


OR


Sleeping Bag:

Mont-bell UL Super Spiral Down Hugger #3 (30 degree sleeping bag) with 800 fill power down.


24 oz sleeping bag for the long size. It features a diagonal stitching design that stretches from 57” to 81” for the inside shoulder girth. You can sit up cross legged while still inside. You can order directly from the Mont-Bell website or campmore.com and other online retailers. I have one of these in the ‘long’ size, although now I use a quilt. They are much more comfortable and lightweight.


Sleeping Pads:


Therm-a-Rest NeoAir X-Lite:


12 oz full length inflatable sleeping pad. This is a luxury item, but it is amazingly light weight and totally comfortable. This link is for the ‘regular’ size, its 20” wide, 6’ long and seems like it may be a little longer. 

Gossamer Gear Nightlight:


Torso length foam pad. It doesn’t get much lighter than this.

Klymit Inertia X-Lite Inflatable Torso Pad: 

http://klymit.com/index.php/products-1/sleeping-pads/inertia-x-lite-orange-short.html

Inflatable torso length sleeping pad. At 5.5 ozs this is the lightest inflatable sleeping pad I have found. It looks strange, but provides comfortable sleep. I use it with a Gossamer Gear 1/8" insulation pad.

Therm-a-Rest Neo-Air X-Therm: 

http://www.rei.com/product/829850/therm-a-rest-neoair-xtherm-sleeping-pad

This is the lightest pad for serious winter/snow conditions. It is very warm and basically reflects your own body head back at your while insulating from the cold below. 


Misc. Items:


Ground cloth:

Gossamer Gear Polycryo:  


1.5 oz ground cloth. 40” x 96” is more than enough room for a solo ground cloth, and it’s a deal for $8.00 you get two.

Poncho/Groundsheet/Pack Cover: 

http://zpacks.com/accessories/groundsheet_poncho.shtml

I made one of these with light material and it weighs 2.5 ozs (with sleeves). Amazing triple use item. If you consider the typical weight of even the lightest options for a groundsheet (1.5 oz), pack cover (1.1 oz) and rain jacket (5 ozs)  the Poncho/Groundsheet/Pack Cover saves over 5 ozs. 


Stakes:

0.2 oz 6.5” titanium stakes. The lightest stakes available.

Vargo 6.5" Orange Shepher Hook Titanium Stakes: 

http://zpacks.com/accessories/stakes.shtml

0.28 ozs 6.5" titanium stakes with orange color. Although these are slightly heavier they are much easier to keep track of.

Carbon Fiber Rutalocura Stakes: 

http://www.rutalocura.com/Tent_Stakes.html

0.2 oz 6" carbon fiber stakes. Better holding power as they are thicker.

Easton Aluminum Stakes: 

http://www.backcountry.com/easton-mountain-products-nano-tent-stakes-4-pack


Cooking:

Caldera Keg:  


Although this is sold as a 6.3 oz complete cook set I just use the parts I need. I just use the Fosters can, lid, ‘cozy’ and a gramcracker esbit stove. With these options my entire cookset weighs under 3 ozs. Just use the Foster can as a cookpot/mug/bowl or whatever.

Winter Stove System: 

http://seatosummitultralight.blogspot.com/2013/05/winter-stove-system-2012.html

The extra weight of my winter stove system is due to the need to melt snow for water. Although the stove system weighs 5.4 ozs it is also heavier due to the canister fuel.


Eating utensil: 

The GSI Telescoping Foon is a spoon/fork combo that folds into half the size that can easily fit into your cookpot. These are delicate and most of mine have broken after a few years. 


Water treatment:

Aqua Mira is THE lightest and most convenient way to safely treat water. I repackage the A and B solution into smaller dropper bottles. By mixing the solution into a small mix bottle each morning I have everything I need for the day. All this for under 2 ozs.

http://zpacks.com/accessories/aquamira.shtml


¼ oz Dropper Bottles:

These are priceless, never carry more than you really need of all misc stuff. Superlight ¼ oz small bottles (they only weight 0.2 oz). I use these to repackage and carry everything from sun screen, bug repellant, campsuds, aqua mira etc. Here’s a link:


Stuff sacks:

Cuben stuff sacks are the lightest. I just make my own and I can hook you up with some good ones to start. Zpacks also has a great selection. A nylon stuff sack weighs 3 ozs. The same size cuben stuff sack weighs 0.20 oz.


Clothing ‘system’:


With these layers you’re good down to well below freezing, rain or shine for around 24 ozs. Multi-use as they are also part of the sleep system.

Base layer(s):

Smartwool merino wool microweight t-shirt. I can wear one of these for a week without washing and it does not get funky. Better than synthetic, amazing, 4 ozs. Cool in the summer/warm in the winter. Pricey but worth it:

http://www.rei.com/product/844121/rei-tech-t-shirt-mens

Icebreaker also makes a quality merino wool microweight t-shirt. I took one of these on the JMT last summer and it lasted 11 days just fine with just a few rinses.

http://us.icebreaker.com/Tech-T-Lite/IBQ231,en,pd.html?dwvar_IBQ231_color=D34&start=7&cgid=mens-tops-short-sleeve


Silk long johns.

Good in the summer. These are multi-use. Worn at night or early morning under a wind shirt/pants to hike and they can also be used as part of your sleep system to warm up your ultralight sleeping bag another 9-10 degrees warmer. They only weigh 3.3 ozs each and are plenty warm for around a campfire in the summer. Amazing. The weight of these with wind shell pants is under 6 ozs, they are warmer than just jeans alone which are 24  ozs. . . dude!


Merino wool long johns.

Good in the fall/winter for colder weather. Smartwool makes microweight merino wool long johns. Amazing warmth for very light weight. These things weigh under 6 ozs each and I was sweating in the store trying them on. Good if you’re expecting very cold weather at high elevation etc.


Puffy Down Jacket:

Mont-Bell Ex Light Down Jacket:


5.7 oz ultralight, compressable and warm down jacket. I have one of these in large, it’s 6.1 oz for the large size. 900 fill goose down, super light, and super warm. A must have for UL packing.

Black Rock Gear Ultralight Down Vest:

http://www.blackrockgear.com/vest.html

4.9 oz ultralight down vest with 2.5 ozs of 900 f/p down!! I returned my size Large as it was a little too snug around the chest and neck. I'm 6' 200 lbs in the off season and down to 185 lbs after a long thru hike. I got an XL and it fits great. 


Wind shell/shirt:

I just made one of these using the Thru-Hiker.com pattern, it’s 2 ozs. The whole windshirt thing is big with ultralighters. Basically a windbreaker, it’s a great way to get an amazing amount of warmth/wind protection with very little weight. It’s also rain resistant, so you can wear it until/if the rain gets bad enough to get out your ‘serious’ rain gear.

If you’re interested in making one I already have the pattern, but it’s probably easier to just buy one. Mont-Bell makes a good 2.3 oz windshirt (with a hood!). It was recently very well reviewed on Backpackinglight:


Shell pants:

I also got the pattern to make my own from Thru-hiker.com for UL nylon shell pants, 1.9 ozs. I used to use those shorts with zip on pants legs which work fine, but the shorts were uncomfortable to hike in. Now I just use lightweight nylon Nike shorts to hike in and change into these shell pants if it gets windy/cold. This is just a preference thing. . .but bringing a separate pair of jeans and cotton shorts is out. My jeans weigh 1.5 lbs. Dude. Here’s a link to lightweight wind shell pants:


Rain gear:

DriDucks is the lightest, most breathable and cheapest way to go. They are a little delicate (especially the pants), but how often do you really need them anyway. $25 for the top and bottoms:


OR

The TNF Triumph Anorak rain jacket: A 5.9 oz fully waterproof rain jacket and wind jacket outer shell. I have one of these in large. This is THE lightest rain/wind shell I could find. Expensive and sometimes hard to find in stock.


Shoes:

Trail runners are the UL shoe of choice. No need for boots if you’re just on a trail. I have put several hundred miles on my Montrail Sabino trail runners and they are just as light as my Nike running shoes. I like the non-gortex kind because they are lighter, breath better and if they get wet they just dry while hiking anyway. 


Gloves and balaclavas:

UL gloves and warm hats for 1oz or less each: I like Smartwool balaclavas and gloves available at REI etc or:

http://www.rei.com/product/835651/smartwool-liner-gloves

http://www.rei.com/product/784560/smartwool-balaclava

Down Beanie: 

This beanie is like a sleeping bag for your head. I use it while sleeping under the stars with a quilt down to 20 degrees and stay warm and comfortable. 

http://www.blackrockgear.com/buy.html

Down Booties: 

I used these down booties until I finally made my own. I bought a pair for my wife and she loves them. In the winter they are an absolute necessity after a long day:

https://goosefeetgear.com/products/1-down-socks


In conclusion: 

There are an infinite number of possible gear options, but these seem to work for me right now. You will probably notice that much of my gear choices are made by small custom "Cottage Manufactures". I like the quality and of course it always feels good to buy from people who are dedicated to lightweight backpacking. 

A great place to get unlimited information and opinions about gear is Backpacklight.com. Check out their site for the most extensive collection of Ultralight information I have found:

http://www.backpackinglight.com/cgi-bin/backpackinglight/forums/index.html


John Muir Trail: Tuolumne Meadows to Devils Postpile

Last spring while walking the dogs I ran into my familiar neighbor Dwayne. Dwayne has an easygoing personality overflowing with the enthusiasm reminiscent of the relatives I knew as a kid in Ohio. He is recently retired and always friendly while leisurely pruning the gigantic sunflowers in his driveway or polishing his new Lexus. He is often seen hiking up the local hillsides to stay in shape for ski season. No big deal. Just another in-shape 60-something enjoying some snow sports. Little did I know that Dwayne had climbed Mt. Whitney several times. . .he did all 20 miles up to 14,496 feet and back as a day hike. Dwayne scoffs at the people who lounge overnight at the base camp along the way. I noticed he was wearing an old Mt. Whitney t-shirt when he gave me a picture of him on the summit. 

There was no time to mention my plans to hike the JMT as he insisted that if it was only possible to do one section on the JMT that his route was the best. On this day he was pouring it on, turning a suggestion into an absolute necessity, something that must be included on ones bucket list.  Dwayne went on to explain the details: Hike the John Muir Trail from Tuolumne Meadows to Reds Meadow Resort (near Mammoth) and pass through the best part of the trail; Ansel Adams Wilderness. None of it was conjecture, there were no opinions. Just facts. This route was the best (period).

He was preaching to the choir. I had already started making plans to finish the JMT in three sections. The first 28 miles in July, the next 32 miles in August and the final 160 miles solo in September. After doing the first part solo the second section would follow his suggested plan exactly. A short time later I had the permit for six people to leave Tuolumne Meadows the last week of August. He was in. We started talking about gear, maps and other details. I prefered to include ultralight gear while Dwayne talked about carrying a nine millimeter for bear protection. I thought this was hilarious. . . who would protect the wildlife from Dwayne? It was all harmless. I would bring my wife Candy, old buddy Brad and newer friend from backpackinglight Jerry. Dwayne would bring a young friend just out of the Marines. Our permit for six was full and we were ready to go.

Two weeks before the trip Dwayne walked across the street to my driveway. He didn't sound good. Unfortunately he had been diagnosed with throat cancer and would be starting chemo therapy soon. He and his buddy were out.

For the months leading up to the these trips I had started to feel uncertain about taking so much time off of work. Dwayne helped me see that the time is now. So off we go ~

Day 0:

After staying at the Mammoth Lodge the night before we met Jerry in front of the lodge and took the early Crest shuttle to Tuolumne Meadows. Jerry had already been hiking for most of the week around Yosemite and was eager to start the trip that morning. We had very little sleep the night before just getting ready to get out of town so we decided to stick with the original plan and kick it around Tuolumne Meadows after picking up the permit. We camped in the backpackers camp and after enjoying some tasty food at the TM 'restaurant' we played cards around camp and got to bed early.


Day 1: 11 miles. Tuolumne Meadows to just above the Lyell Fork Bridge.


The next morning we got a relatively early start (for a group) and followed the trail from the backpackers camp to the JMT that Jerry had scouted out. Soon we were enjoying the leisurely hike up Lyell Canyon. Here's the crew on day 1:


Andy, Candy, Jerry & Brad.
We started at Tuolumne Meadows.
The water had a greenish/aqua color and was clear all the way to the bottom. . . and very cold.

The water along the Lyell Fork of the Tuolumne River was beautiful.


Wildlife in Lyell Canyon.

Lyell Canyon: Click for Full Size Pano.

It's an easy mainly flat hike to the end of Lyell Canyon. Soon Donohue Pass was in view. We would be hiking over the snow covered mountains in the background the next day. . .

Lyell Canyon with Donohue Pass in the distance.

We could hear this waterfall from a long way, it's draining from the snowfields above along the Kuna Crest:

We could hear this waterfall for miles away. This is near the end of Lyell Canyon. The water is draining from snow on the Kuna Crest.

By early afternoon we arrived at the end of Lyell Canyon so there was plenty of time to start up the first switchbacks toward Donohue Pass. Here's the view back towards Lyell Canyon from the first switchbacks:

Looking back at Lyell Canyon as we hiked up the beginning of Donohue Pass.

After about 900 feet of elevation gain we reached the Lyell Forks Bridge. Candy was starting to feel the effects of the elevation but powered through with no problem.

After hiking up the first 900 feet of switchbacks out of Lyell Canyon we finally reached the Lyell Fork Bridge. We camped nearby after making about 11 miles the first day.
We used head nets around camp to keep the bugs away.

Andy & Candy in camp.

Jerry chilling after a long day. Being a well prepared UL'er Jerry brought a Kindle (4 oz) with the JMT guidebook already downloaded on it. When it was time to find a good camp at the end of the day he just consulted the JMT guidebook. Jerry was a very welcome part of the group!


Jerry's Zpacks Hexamid Twin Tent with optional extended beak. 11.1 ozs of cuben luxury.


Day 2: 8 miles. Lyell Forks Bridge to Thousand Island Lake:


The next morning we started up the final part of Donohue Pass:


Ready to get head over Donohue Pass.

Jerry & Brad, trail dudes. Jerry is carrying a Gossamer Gear Gorilla . Brad is trying out a new Osprey Exos.


The view facing south from the top of Donohue Pass (11,056 feet). We are using lightweight backpacks made from cuben fiber. Candy is carrying a ZPacks Zero and I'm using a home made pack of my own design. Each one only weighs about 6 ozs. Candy's total pack weight was 10 lbs, mine was 20 lbs (I was carrying the tent and food for two people for four days). Going lightweight made the trip a breeze.


A short video from the top of Donohue Pass.


That is Brad heading down from Donohue Pass on the south side towards Island Pass. The well maintained trail made for an easy hike down.


We descended into this amazing area with crystal clear creeks that meandered throughout the boulders, puffy grass and flowers.


As we passed through I made a mental note to go back to this area between Donohue Pass and Island Pass to explore later.


Soon we had reached the top of Island Pass and into Ansel Adams Wildnerness.


Video of Candy on top of Island Pass.


Soon we had our first glimpse of Thousand Island Lake. . .


 We camped along the shore of Thousand Island Lake with amazing views of Banner Peak. We all had dinner on a little peninsula. The color of the water reminded me of the Bajamas, but much much colder. There was actually a sandy bottom which felt great on our sore feet.


Day 3: 10 miles. Thousand Island Lake to Gladys Lake.

Thousand Island Lake.


Thousand Island Lake. 


At first light I got up and took these picture from a little rock island in the lake near our camp. Jerry was eager to hit the trail and he said goodbye at about 6:30 am while I was taking these photos. From there on out it was just the three of us.

Click for Full Size Pano.


Click for Full Size Pano.
As we head back toward the JMT (our camp was accessed from a use trail along Thousand Island Lake, a 1/2 mile detour off the JMT) we ran into a family of ducks. The Lupin was still blooming along the shore. The start of a great day. . .

Brad, Candy & Ducks on the trail.
The footbridge at the outlet of Thousand Island Lake.

Garnet Lake, Mt. Ritter and Banner Peak from the JMT.

The footbridge over the outlet of Garnet Lake.


On the Garnet Lake footbridge.

Goofing for the camera.

We camped at Gladys Lake the third night. The lake was cold but the water felt great washing off the days trail dust. We made a quick dinner and enjoyed the sunset on the lake. Candy and Brad were eager to get an early start the next day and get home. . . I was in no hurry to leave the wilderness.


We used a Big Sky International 2 person tent. At the time it was the lightest freestanding 2 person tent with 2 doors and 2 vestibules. They have since started to offer a cuben version that is lighter but over $800. Ouch:).

Gladys Lake the last night.


Brad used the Six Moon Designs Gatewood Cape & Serenity Net Tent:


Sunset on Gladys Lake.

Sunrise on Gladys Lake.

Day 4: 5 miles. Gladys Lake to Devils Postpile.


We got an early start and soon we were at Devils Postpile.
After getting an early start on day four we arrived at Devils Postpile.


The top of the postpiles were, mostly like you would expect. Postpiles with some glacial polishing thanks to the most recent ice age.


C'Andrew on top of the postpiles.


Andy, Candy & Brad at the Postpiles.

This was an easy group hike at a leisurely pace with low daily mileage to keep it fun for all. We hiked about 32 miles in 3 and 1/2 days. This was Brads first experience with lightweight gear and he was hooked. Over the years I have ended up with a bunch of extra lightweight gear and I am always happy to lend UL gear to friends. Brad liked the SMD Gatewood Cape and Serenity Net Tent so much that he ordered his own when he got home.

Candy likes the double wall two person tent (the 'Condo') and the comfort of a full length Therm-a-rest Neo-Air sleeping pad. She sleeps cold and uses a 15 degree sleeping bag to stay toasty warm and comfortable at night. I carried the food, tent and sleeping pads for both of us. 
Carrying a heavier pack than usual felt like good training for the 160 mile thru-hike section that I was starting in two weeks. I was definitely ready to do 15 - 20 miles a day.

What worked:

Easy low mileage days for Candy & Brad since this was their first time doing over 5 miles/day.

Lightweight home made quilt. I brought a 17 ounce 20 degree rated quilt that was actually too warm. I probably could have used a 12 ounce 40 degree quilt and been just fine.

What didn't work:

Trying to stay together on the trail all day. It would have been easier to just pick a lunch spot and final camp spot and agree to meet along the way.


If you are reading this as part of the JMT 2011 Trip Report follow this link: